Mastering the HTML5 Canvas – Part 1
This begins a series of blog posts on mastering the HTML5 Canvas.
We’ll be focusing first on animation as it is one of the best ways to leverage the canvas to bring new interaction types and visualizations to your web applications. Here’s a preview of what we are building for part 1.
Canvas Overview
The HTML5 canvas provides an immediate mode 2d rendering API which we can use in our web applications. It depends on no browser plugins, only requiring a modern enough browser that supports the HTML5 Canvas component. Even if trying to support older versions of Internet Explorer (8 and below), though, there are some polyfills that can be used to attempt to provide support for them (FlashCanvas, exCanvas, etc).
Because the canvas is an immediate mode rendering engine, rather than building an object graph that represents all the objects that are visible, as you would in a retained mode system like Silverlight or WPF, we will talk to the rendering context of the canvas and, for each frame, we will tell it which visual primitives to render at which locations.
Hello Circle
To begin with, lets render a circle to the screen.
We will assume that jQuery has been referenced for this web application to assist us in manipulating the required DOM elements succinctly. But jQuery is certainly not required in order to interact with the canvas. First, we will start with the DOM. We need to add a canvas element somewhere in our DOM hierarchy where we want to display the canvas content. In this case, its the only element in my page body.
<canvas id="canvas"></canvas>
I’ve provided an id so that we can easily find this element later when we want to render its content.
Now its time to render the circle into the canvas. We need to start by acquiring the 2D rendering context from the canvas. The rendering context is what surfaces the API to us that we need to render primitives into the canvas.
$(function () {
    var canv, context;

    $("#canvas").attr("width", "500px").attr("height", "500px");
    canv = $("#canvas")[0];
    context = canv.getContext("2d");
Here we are using jQuery to locate the canvas by id, then setting its width and height. Something that may confuse you initially is that there are really two widths and heights that are relevant to the canvas. The canvas element has attributes for width and height that represent the size of the bitmap that is used for rendering content within the canvas. Meanwhile, you can also set a css width and height on the canvas. These represent the size that the bitmap generated by the canvas is scaled to when displayed in the page. So, for example, if you created a 50px by 50px canvas and scaled it to 500px by 500px, it would look very blocky as you would be stretching a 50px square to fill a 500px square area. Most of the time, you will probably want the css size to be the same as the attribute size of the canvas.
Next, we extract a reference to the canvas DOM element from jQuery and call getContext(“2d”) to get the rendering context. Why getContext(“2d”)? This is because the HTML5 canvas also plays an integral role in WebGL, beyond its 2D API, but for now, we are talking about 2D.
Next we render the actual circle. Here I’m defining a function called draw that will render the circle and then calling it to do the actual render. Why did I split this up? This will become apparent when we add animation into the mix.
function draw() {
   context.fillStyle = "rgb(255,0,0)";
   context.beginPath();
   context.arc(150, 150, 120, 0, 2 * Math.PI, false);
   context.fill();
}

draw();
Here we are:
- Setting the fill style of the canvas to red. You can use most syntax that a css color property will accept here.
- Telling the context to begin a new path.
- Drawing an arc with a center at 150px, 150px with a radius of 120, sweeping from 0 to 360 degrees, in a clockwise direction (note, the API actually wants radians, not degrees)
- Telling the context to fill the path that we have defined, thus filling the circle.
And here is the result.
Hello Animation
Now, lets animate our circle in some way.
First here’s the modified logic from our previous version:
var canv, context, lastTime, duration, progress, forward = true;

$("#canvas").attr("width", "500px").attr("height", "500px");
canv = $("#canvas")[0];
context = canv.getContext("2d");

lastTime = new Date().getTime();

duration = 1000;
progress = 0;

function draw() {
    var elapsed, time, b;

    time = new Date().getTime();
    elapsed = time - lastTime;
    lastTime = time;

    if (forward) {
        progress += elapsed / duration;
    } else {
        progress -= elapsed / duration;
    }
    if (progress > 1.0) {
        progress = 1.0;
        forward = false;
    }
    if (progress < 0) {
        progress = 0;
        forward = true;
    }

    b = 255.0 * progress;
    context.fillStyle = "rgb(255," + Math.round(b.toString()) + ",0)";
    context.beginPath();
    context.arc(150, 150, 120, 0, 2 * Math.PI, false);
    context.fill();
}

window.setInterval(draw, 1000 / 60.0);
So what are the differences above?
First, we are using window.setInterval to call our draw method repeatedly. We are attempting to do this 60 times a second (1000 milliseconds / 60.0).
window.setInterval(draw, 1000 / 60.0);
Next, for each time we are drawing, we are determining how much time elapsed since the last frame that was drawn and updating our progress toward the completion of the animation. When the progress reaches complete, we reverse direction and decrease it back down to 0. Then, when we hit 0 we turn around and progress toward 1 again. This way the animation just loops backward and forward continually.
time = new Date().getTime();
elapsed = time - lastTime;
lastTime = time;

if (forward) {
    progress += elapsed / duration;
} else {
    progress -= elapsed / duration;
}
if (progress > 1.0) {
    progress = 1.0;
    forward = false;
}
if (progress < 0) {
    progress = 0;
    forward = true;
}
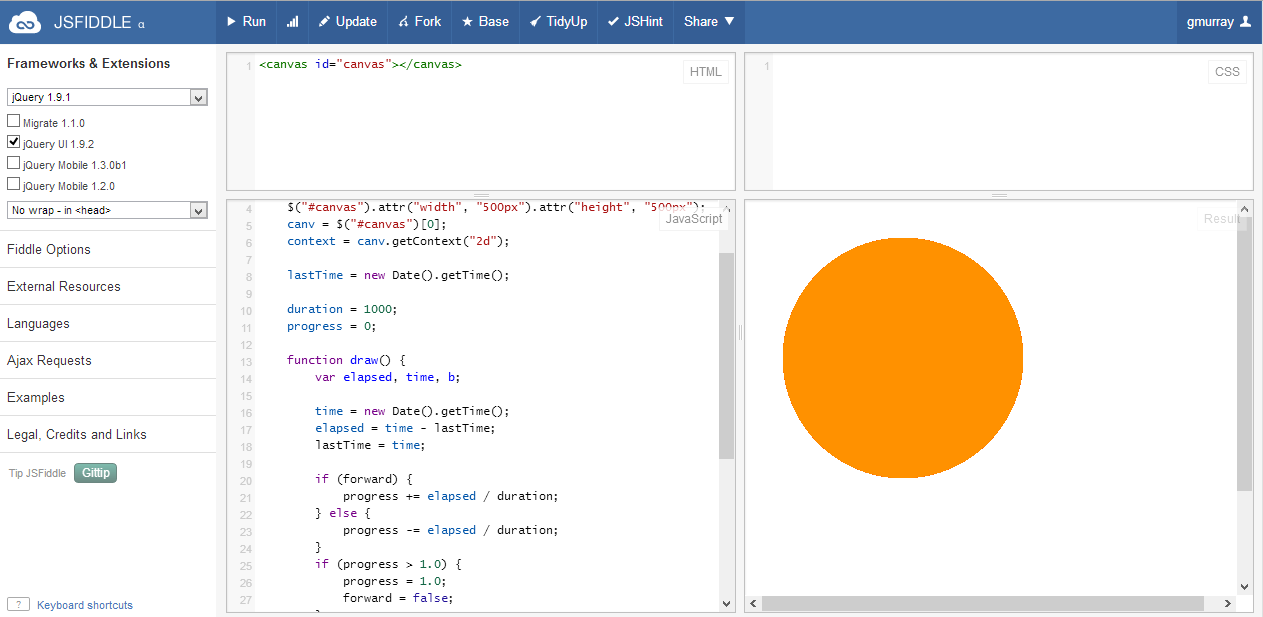
Next, the progress is used to drive the color we are using to render the ellipse.
b = 255.0 * progress;
context.fillStyle = "rgb(255," + Math.round(b.toString()) + ",0)";
And so we have an ellipse that animates in color.
Improving Our Animation
We can make a small adjustment to the above in order to improve the way that the animation is performed. There are two assumptions that the above logic makes that are not necessarily true. It assumes both that the machine running the logic will be fast enough to provide a 60fps animation, and that the draw method will be called with reliable enough timing to create a smooth animated effect. Both assumptions are not necessarily true. The machine may be too slow to perform the animation update the required number of times a second, and setInterval is not gauranteed to be called reliably at all, especially if lots of logic is hammering the javascript event queue. Some modern browsers support an API that lets us do better than this when performing animation. We can essentially request that the browser notify us when an animation frame is ready, so that we can respond by rendering some content. This provides more reliable and smooth animation, and should avoid us trying to animate more frames than the system is able to handle. Here is the modified version of the logic that will use a polyfill to use the requestAnimationFrame API, if present, and otherwise fall back on our previous method for animating if we are on a browser that does not support requestAnimationFrame.
function ensureQueueFrame() {
    if (!window.queueFrame) {
        if (window.requestAnimationFrame) {
            window.queueFrame = window.requestAnimationFrame;
        } else if (window.webkitRequestAnimationFrame) {
            window.queueFrame = window.webkitRequestAnimationFrame;
        } else if (window.mozRequestAnimationFrame) {
            window.queueFrame = window.mozRequestAnimationFrame;
        } else {
            window.queueFrame = function (callback) {
                window.setTimeout(1000.0 / 60.0, callback);
            };
        }
    }
}

$(function () {
    var canv, context, lastTime, duration, progress, forward = true;
    ensureQueueFrame();

    $("#canvas").attr("width", "500px").attr("height", "500px");
    canv = $("#canvas")[0];
    context = canv.getContext("2d");

    lastTime = new Date().getTime();

    duration = 1000;
    progress = 0;

    function draw() {
        var ellapsed, time, b;
        queueFrame(draw);

        time = new Date().getTime();
        ellapsed = time - lastTime;
        lastTime = time;

        if (forward) {
            progress += ellapsed / duration;
        } else {
            progress -= ellapsed / duration;
        }
        if (progress > 1.0) {
            progress = 1.0;
            forward = false;
        }
        if (progress < 0) {
            progress = 0;
            forward = true;
        }

        b = 255.0 * progress;
        context.fillStyle = "rgb(255," + Math.round(b.toString()) + ",0)";
        context.beginPath();
        context.arc(150, 150, 120, 0, 2 * Math.PI, false);
        context.fill();
    }

    queueFrame(draw);
});
Next Time
Next time we will take on something much more ambitious. We will build an eye catching animation that reacts to the mouse movement over the canvas. We will also simulate some 3D effects using 2D rendering but 3D matrix transformations.