
Run Fast Using Virtualization in Ignite UI for JavaScript Grids
Why Virtualization?
Virtualization is a valuable tool for displaying large sets of records to end users. A virtualized grid can bind to and support a data source of thousands of records, while providing users with rapid scrolling and response.
The Ignite UI for JavaScript igGrid supports two types of virtualization:
- Continuous Virtualization
- Fixed Virtualization
In fixed virtualization, only the visible rows are rendered in the grid; in continuous virtualization, a pre-defined number of rows are rendered in the grid. The Ignite UI for JavaScript grid can be configured for column virtualization, row virtualization, or both. In row virtualization, the data row will be virtualized; in column virtualization, columns of the data source will be virtualized. You may choose to enable column virtualization when your data source has a large number of columns.
At the end of the lesson, you will have a working grid configured for virtualization in an Angular application. You can learn more about Ignite UI for JavaScript Angular components; you can also learn more about Angular in Angular Essentials, a free eBook published by Infragistics.
Lesson Objectives
- Configure the grid for fixed virtualization.
- Configure the grid for continuous virtualization.
For more information on the controls used in this lesson, see Ignite UI Data Grid.
Setting up the Project
You may download the starter project for this lesson by clicking here. (You can also download the final project by clicking here.)
After downloading the project, navigate to the directory and run the commands below:
- npm install
- npm start
Execute the npm install command to install all dependencies, and execute the npm start command to run the Angular application. If the project setup is correct, you will have a running Angular application with a grid as shown below. If you receive an error while running the application, stop and run the npm start command again.
The starter project includes a grid that was created with a large set of data. Since virtualization is not yet enabled on the grid, the grid is taking some time to render all of the records. In addition, it is rendering all rows at once. For 5,000 rows, the grid is creating 5,000 row elements on the DOM, which causes the application to run more slowly and less efficiently. Configuring virtualization on the grid will allow you to run the application faster, even with a very large set of data.
The starter project of this lesson contains code to work with REST API in an Angular application to create a large data set. To work with REST API and server communication, Angular provides an http class.
Learn more about the http class and server communication in Angular.
Step 1 Enabling Fixed Virtualization
To enable virtualization, you must set these three properties of the Ignite UI for JavaScript grid.
- virtualizationMode
- virtualization
- height
You must set the height property of the grid to enable virtualization. If the height property is not set, and virtualization is true, Ignite UI for JavaScript will throw an error.
To enable both row and column virtualization, set the value of the virtualization property to true. The virtualization property can also be set to a numeric value so that virtualization will be enabled whenever the number of records in the data source exceeds a specified number.
To enable fixed virtualization, set the following properties of the grid:
- Set the virtualization property to “true”.
- Set the virtulizationMode property to “fixed”.
- Set the height property to some pixel value (here it will be set to “300px”).
To configure all of these properties of the grid: In the app folder, open the grid.component.ts file and update the getGridOptions() function as shown in the highlighted listing below. You are adding three more properties to the existing grid options.
getGridOptions() {
return {
width: "100%",
autoGenerateColumns: false,
height: "300px",
virtulization: true,
virtualizationMode: "fixed",
columns: [
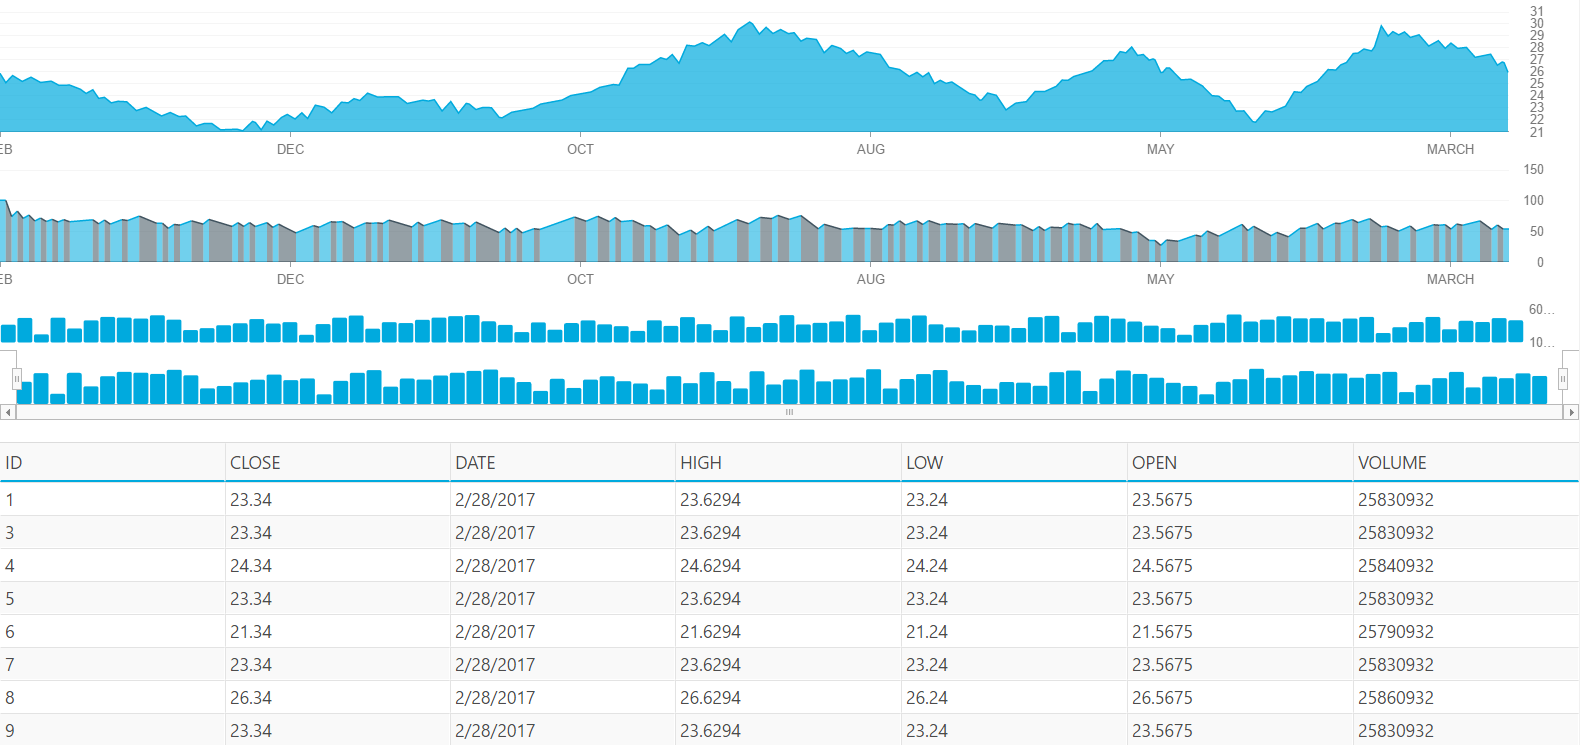
{ headerText: "ID", key: "Id", dataType: "string",width:"10%" },
{ headerText: "CLOSE", key: "Close", dataType: "number",width:"15%" },
{ headerText: "DATE", key: "Date", dataType: "string",width:"15%" },
{ headerText: "HIGH", key: "High", dataType: "number",width:"15%" },
{ headerText: "LOW", key: "Low", dataType: "number",width:"15%" },
{ headerText: "OPEN", key: "Open", dataType: "number",width:"15%" },
{ headerText: "VOLUME", key: "Volume", dataType: "number",width:"15%"}
]
};
}To test the fixed virtualization, navigate to the application and scroll down to find the grid configured with fixed virtualization added, as shown below:

Step 2 Enabling Continuous Virtualization
To enable continuous virtualization, set the following properties of the grid:
- Set the rowVirtualization property to “true”.
- Set the virtulizationMode property to “continuous”.
- Set the height property to some pixel value (here it will be set to “300px”).
To configure all of these properties of the grid: In the app folder, open the grid.component.ts file and update the getGridOptions() function as shown in the highlighted listing below:
getGridOptions() {
  return {
    width: "100%",
    autoGenerateColumns: false,
    height: "300px",
    rowVirtualization: true,
    virtualizationMode: "continuous",
    columns: [
      { headerText: "ID", key: "Id", dataType: "string" },
      { headerText: "CLOSE", key: "Close", dataType: "number" },
      { headerText: "DATE", key: "Date", dataType: "string" },
      { headerText: "HIGH", key: "High", dataType: "number" },
      { headerText: "LOW", key: "Low", dataType: "number" },
      { headerText: "OPEN", key: "Open", dataType: "number" },
      { headerText: "VOLUME", key: "Volume", dataType: "number" }
    ]
  };
}
To test the continuous virtualization, navigate to the application and scroll down to find the grid configured with continuous virtualization added, as shown below:

In continuous virtualization, only a portion of the total rows in the data source are rendered in the DOM. As the user scrolls up and down on the grid, the virtualization feature determines if the current rows are sufficient to display the next or previous portion of rows. If new rows are required, the current portion of rows is deleted and the new portion of rows is created.
Conclusion
In any functional LOB application, your grid must be able to render thousands of records with rapid scrolling and response. You can achieve this by enabling the virtualization feature on the Ignite UI for JavaScript grid.